I have recently discovered a super simple technique for creating beautiful chalk art, and after having successfully made a piece for my home, I wanted to give a gift to a friend. I asked her if she had a favourite quote or verse for the baby, and she gave me Psalms 139:13&16,
"For You created my inmost being. You knit me together in my mother's womb,
you saw me before I was born. Every day of my life was recorded in your book.
Every moment was laid out, before a single day had passed."
Beautiful.
So I started planning out my design by using photoshop, and tested out a whole swack (that's definitely a word) of fonts that I found on the internet. After finalizing the layout, I went garage sale hunting for a frame that I could paint... that's when I found this gem:
Why someone would give this treasure away is beyond me. It only cost me $2. :)
Since chalkboard paint on canvas didn't have the desired effect I was looking for, I went to Home Depot and purchased a 2' by 2' piece of hardboard that I had cut down to size. I still had a can of chalkboard paint that I had leftover from the wedding, so I got straight to it, and I didn't prime the board or anything.
Yes, I did paint indoors, and on top of our beautiful rug. But I was careful... I promise.
TIP: After you paint with chalkboard paint and it's dry, you need to take a piece of chalk and rub it over the whole thing. You can use a wet rag to wipe it all off after, but you need to do this in case you want to use your chalk sign more than once. If you don't, and then you decide you want to erase your first chalk sign for another, "ghost" marks get left behind and it's not useable.
Now here's the real trick. To get your desired image on your chalk board, without having to rely on your steady hand and fourth grade knowledge of drawing with chalk, you follow these simple steps:
#1. Print your template to size. My chalkboard was obviously larger than a letter sized piece of paper, so I "cut" the image in photoshop into small pieces so that I could put them back together, like a puzzle, once they had been printed. Google helped me on this one. Just look up "printing a large image onto multiple pages in photoshop".
#2. Tape or glue all your images together so you have a combined image that is exactly to scale.
#3. Cover the back of the paper with your image in chalk. You can use the side of the chalk to make it go quicker.
#4. Carefully place your image on your chalkboard, so that the smeared chalk is on the chalkboard, and the image sits where you want your chalk image to be on the board.
#5. Tape your image onto your board, and then, using a pencil, carefully trace over the letters. Be careful to stay within the lines. The chalk on the back side of your paper will rub off, leaving you with an outline of your image that you can easily go over with a fresh piece of chalk.
Here's what my image looked like after I had traced over the letters:
It's not perfect, but it is WAY better than if I did it all by hand.
Step #6 would be to go over your image again in chalk to brighten it up and fill in any spots that you missed... then...
#7 ---> best tip <--- use a q-tip dipped in water to clean up the smudges.
Doesn't the finished product look professional? Or close to it?
I cleaned the image up a bit more before I presented it to her... but I was quite pleased with myself.
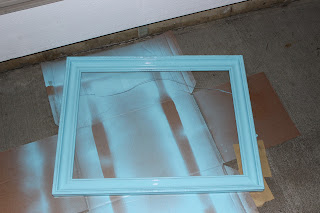
My friend's nursery colours are aqua and orange, so I purchased some aqua spray paint and gave my garage sale frame a make over.
Once it dried, I put my chalkboard art into it's frame and voila!
Feel free to email me or comment if you have any questions!
Lindsey


I LOVE this! You have done a fabulous job! Could you tell me how you do the banner and swirly accents in photoshop? I would love to make a chalk board design for a special friend for Christmas… Thanks!
ReplyDeleteHey thanks! The swirly accents are actually from a font I downloaded called Bergamot Ornaments. You can download it here: http://www.dafont.com/bergamot-ornaments.font
DeleteFor the banner, I think I just googled banner images until I found one I liked. Sorry I can't be more specific! Have fun making your chalk board, let me know if I can help in any way! :)